Thursday 14 February 2013

Editing - Chroma Keying


This is the window that appears when you open up Adobe After Effects. This is the primary work station I had to use when editing my green screen footage.
The first thing I had to do was import my green screen footage that we shot. It is very important that these shots are light well and equal so that you get the best result in the end. The shot I have above is an example of a good shot as it is light well, there might be a problem with the shadows of the two people in the background be hopefully this shot will work. I also had to place the white background as the second layer, so when I remove the green, it will be visible.

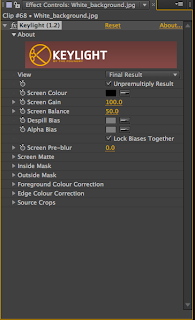
The next step is to go to the effects tool bar and select KEY.
I then needed to select the tool KEYLIGHT, which is the
software that we need to used to make the green screen work. 


Now we have the tool open the first thing you need to do is to is select the pincher on the left and select the brightest green part of the shot. This is vital in getting the best results.
Once the pincher tool has been used you can see that the there are still some black specs on image. This is normal and there is a easy way of getting ride of it. To do so, I had to go to VIEW and select SCREEN MATTE. 
Once SCREEN MATTE has been selected you should be giving this view of the the footage. Then you must select the Screen Matte options shown on the primary work face of the tool. This will open a selection of different option you can use to improve your image. The first one you must choose is the CLIP BLACK & CLIP WHITE. This is needed to allow the green to be complete wiped from the image. The key to doing this is making the images black areas as solid as possible and the white as solid as possible. 


I then played with different effects and changes that I could make to my shot, improving it as much as possible. This includes the SOFTNESS, SHRINK.GROW and the REPLACE METHOD. Once down click back on the FINAL RESULT.


Then use the pen tool to crop out the the other area of the image, revealing the the image as it will look in the final result.
I also played with the size of my image which then allowed me to move the shot around the canvas.
FINAL RESULT: Once I edited the shot this is the final one that has been put into the video. Overall I am happy with the outcome of the shot as it looks very clean and well chroma keyed.


No comments:

Post a Comment